
Last week we ( I have my Creative Biscuit hat on today, and a fine hat it is too even if I do say so myself) took part in a collaboration with the fantastic Craft Guerrilla to create some geometric printed tiles and we were pretty pleased with the results!

Hand printing on ceramics can be a tricky business because the type of paint we use (Gare Fun Strokes , fact fans) doesn’t particularly like staying on most surfaces without a slightly messy fight. However, we believe Ms Craft Guerrilla AKA Debbie Daniel has found a nifty way of defeating the Gare, with this handy little tutorial.
Rather than using lino the key seems to be printing with craft foam, which not only holds the paint better, but is a darn sight cheaper. You can get it from Hobby Craft – although always remember other smaller independent craft foam suppliers are available!
So how do you do it? Here goes…
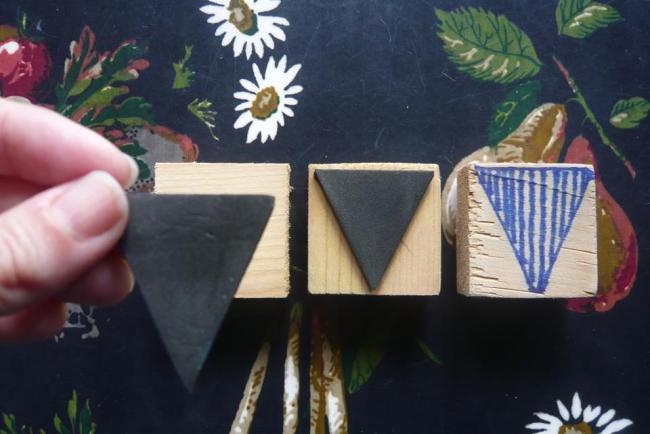
- Cut your craft foam into the shape you would like – we went for a simple triangle shape as you can see above.
- Cut two or even three of the same shape so you can build it up to a good thickness.
- Get a small square of wood (we got ours free from a local timber yard who were happy to give it away rather than stick it on the rubbish pile) and take your chosen foam shape and draw a pencil outline around it in the middle of the wood – This will help you know exactly where you are printing on the ceramic and help you line up your next shape.
- Then, on the other side of the wood, use a strong adhesive to glue your foam to the wood.

Apply a thin layer of paint to the stamp with a sponge – not a brush as it’s tricky to get it as even and thin enough – and get stamping on your unglazed bisque. There are no rules. Do it as few or as many times as you like, change colours. Go crazy. Well, as crazy as you can with a delicate ceramic.

When you are done marvel at your handiwork and get it glazed and in the kiln. Wait 72 hours and then impress your friends with your super modern and funky geometric tile.

Admittedly this can’t be done at home, unless you have a kiln of course, but then I don’t imagine you have a double coffee machine at home and quick access to Tim’s brownie, so it’s probably best to come to Creative Biscuit to give it a go. You could also use the same technique with different paint to print on all kinds of things.
X
Karen
** Creative Biscuit is a family run ceramics café in South Woodford, London. We -Craft Guerrilla- love this kind of crafty business and we'd love to recommend them to you all! It's a creative place where you can buy designer maker gifts or make your own.
They run a host of workshops from ceramic painting, kids craft workshops, hen do's and parties all with a crafty theme... or just pop in for a hot cupper & cake! Plus they also sell a ceramics D.I.Y. take away painting set so you can host your own house party and bring it back to be fired! How awesome is that? If you'd like to book please contact Karen or Tim via their Face Book page! **

No comments:
Post a Comment